Configure the VPN for Mac OSX : Différence entre versions
| Ligne 3 : | Ligne 3 : | ||
1 - You will need the OpenVPN configuration file. | 1 - You will need the OpenVPN configuration file. | ||
| + | Prepare a file named config.conf with this text. | ||
| − | |||
| − | Remember to replace | + | ''Remember to replace your servername'' by the name of your server seedbox: |
client | client | ||
| Ligne 12 : | Ligne 12 : | ||
dev tun | dev tun | ||
| − | remote | + | remote your servername 1194 |
proto udp | proto udp | ||
| Ligne 46 : | Ligne 46 : | ||
3 - Download and install the VPN client Tunnelblick | 3 - Download and install the VPN client Tunnelblick | ||
| − | |||
Please go to this address: | Please go to this address: | ||
| Ligne 53 : | Ligne 52 : | ||
[[Fichier:500px-Vpnmac2water.png|thumb|none|500px|]] | [[Fichier:500px-Vpnmac2water.png|thumb|none|500px|]] | ||
| − | |||
==Installation and Configuration== | ==Installation and Configuration== | ||
| − | When you launch | + | When you launch Tunnelblick, click I Have configuration files |
[[fichier:500px-Vpnmac3water.png]] | [[fichier:500px-Vpnmac3water.png]] | ||
| − | Then click on OpenVPN configuration | + | Then click on OpenVPN configuration |
[[fichier:500px-Vpnmac4water.png]] | [[fichier:500px-Vpnmac4water.png]] | ||
| Ligne 90 : | Ligne 88 : | ||
| − | The folder becomes a file. Double-click it to start the configuration. | + | The folder becomes a file. Double-click on it to start the configuration. |
Tunnelblick proposes to install this connection for all users or only for you. | Tunnelblick proposes to install this connection for all users or only for you. | ||
| − | Select All Users (for all users on your computer) or Only Me (only you) depending on what you want. | + | Select All Users (for all users on your computer) or Only Me (only you), depending on what you want. |
[[fichier:500px-Vpnmac8water.png]] | [[fichier:500px-Vpnmac8water.png]] | ||
| Ligne 108 : | Ligne 106 : | ||
[[fichier:500px-Vpnmac10water.png]] | [[fichier:500px-Vpnmac10water.png]] | ||
| − | |||
| − | |||
Now you use your VPN. | Now you use your VPN. | ||
Tunnelblick icon in the menu bar should be turned yellow. | Tunnelblick icon in the menu bar should be turned yellow. | ||
Version du 15 mars 2012 à 11:59
Prerequisites
1 - You will need the OpenVPN configuration file.
Prepare a file named config.conf with this text.
Remember to replace your servername by the name of your server seedbox:
client
dev tun
remote your servername 1194
proto udp
nobind
resolv-retry infinite
persist-key
persist-tun
ca server.crt
cipher BF-CBC
comp-lzo
verb 3
auth-user-pass
route-method exe
route-delay 2
dhcp-option DNS 8.8.8.8
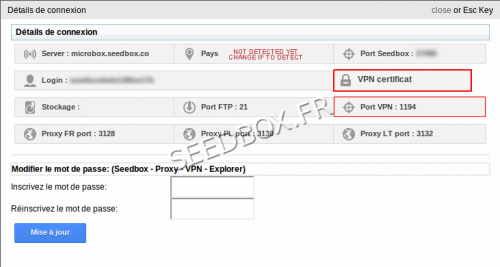
2 - Get the security certificate available in your manager.
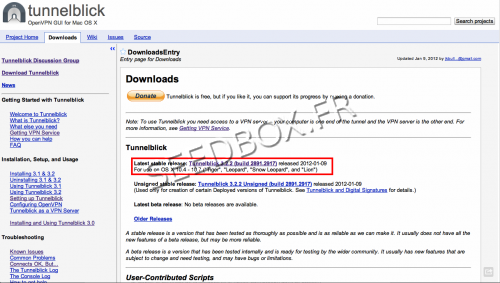
3 - Download and install the VPN client Tunnelblick
Please go to this address:
http://code.google.com/p/tunnelblick/wiki/DownloadsEntry?tm=2
Installation and Configuration
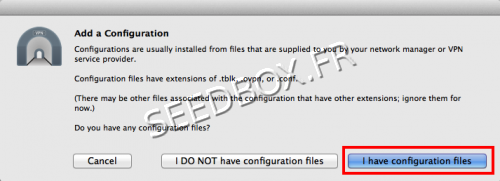
When you launch Tunnelblick, click I Have configuration files
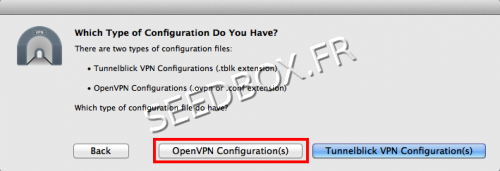
Then click on OpenVPN configuration
Then click Create Tunnelblick VPN Configuration
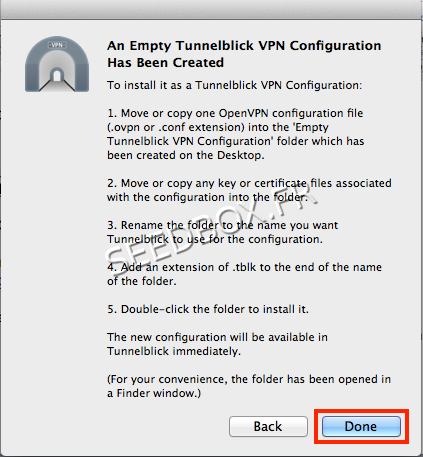
A new window informs you that your VPN has been created.
Click Done
Tunnelblick has created a folder on the desktop "Empty Tunnelblick VPN Configuration".
Copy the security certificate for your server and the file config.conf in this case.
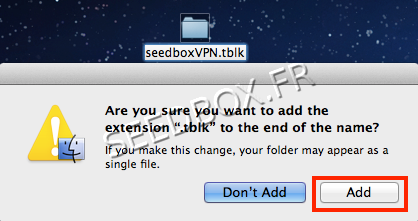
You can rename the file (this name will be taken to name the VPN connection) and add the extension .Tblk .
For example, rename the file seedboxVPN.tblk then confirm by clicking on Add.
The folder becomes a file. Double-click on it to start the configuration.
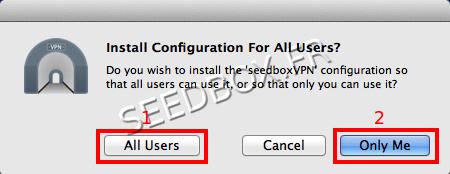
Tunnelblick proposes to install this connection for all users or only for you.
Select All Users (for all users on your computer) or Only Me (only you), depending on what you want.
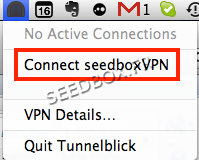
Initiate the connection from the Tunnelblick icon in the menu taskbar
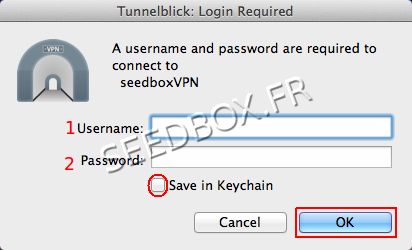
Enter your username (1) and password (2) seedbox connection . (Available in your manager).
Now you use your VPN.
Tunnelblick icon in the menu bar should be turned yellow.
