Download and install Cyberduck for Windows Seven
De Documentation officielle Seedbox
Révision datée du 21 janvier 2015 à 14:16 par Pascal (discussion | contributions) (→Configure a new FTP connection with Cyberduck)
Sommaire
Download and install Cyberduck for Windows Seven
Download the latest version
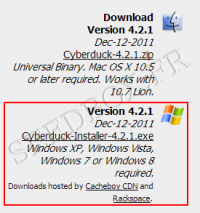
- Go to this address:
- Then, download Cyberduck 4.2.1 version for Windows.
Install Cyberduck
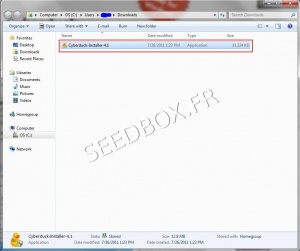
- Once the program is downloaded on your computer, you must install it now.
- Click on the folder representing your download :
- For all instalation stages that follow, we advise you to not modify the default choices.
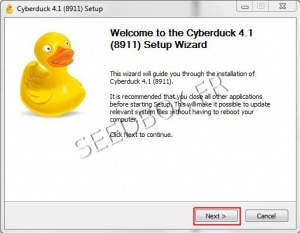
- To start installing the software, click on Next
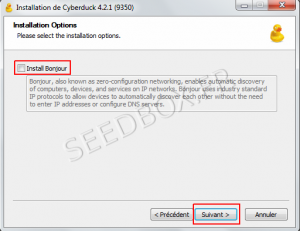
- Then, at this stage, you can choose to install "Bonjour" for Windows.
- Once you made your choice, click Next.
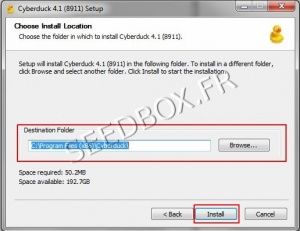
- Now select the installation directory for your software.
- Now click on "Install".
- Your program is now ready to be used.
Configure Cyberduck
- At first launch and only if you have Filezilla, a window opens to offer you to import favorites.
- To do this, click on "Import Bookmarks", otherwise click "Cancel"
Configure a new FTP connection with Cyberduck
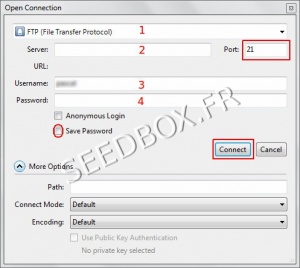
- First click on the icon (1) "Open Connection" from Cyberduck task bar.
- A new window opens. This is where your ftp configuration must be performed.
- Select the connection type. Here FTP.
- Enter your server address without any http or ftp.
- Enter your username. (The one chosen on your order form)
- Enter your password. (The one chosen on your order form).
- Do not change the port preset
- Finally, click "Login".
Cyberduck interface
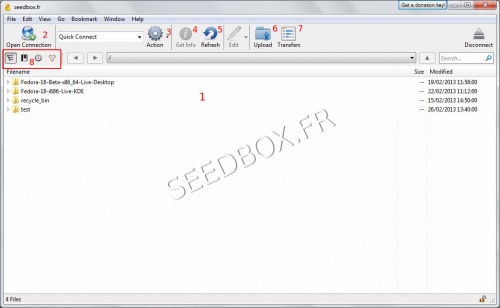
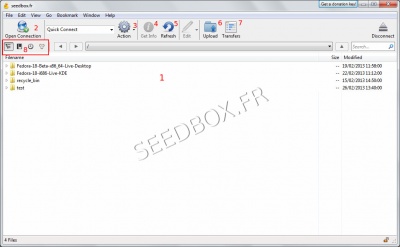
- Cyberduck main window looks like this:
- Your FTP server contents.
- Here you can set up a second connection.
- Includes all the actions you can perform on a file.
- Provided information about your file.
- Refreshes the contents of your ftp server.
- To transfer a file from your computer to your server.
- Displays downloads in progress.
- Changes the display of the main window.
Use Cyberduck
Transfer a file from your server to your computer
- To download a file, select it in the main Cyberduck window (1), then just click on the cog wheel (3) and choose Download from the drop-down list.
- The transfer starts automatically, and your file is sent to the default directory.
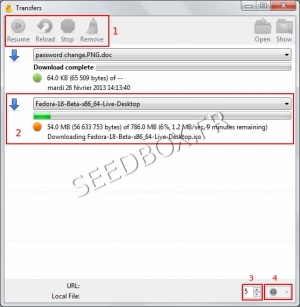
- A new window will appear summarizing your transfers.
- The task bar (1) allows actions on the files being downloaded.
- In the main window (2) are shown your current downloads as well as related information such as transfer speed or time remaining before the download will be completed.
- You can change simultaneous download number using the icon (3).
- Window number (4) allows you to set your transfer speed.
Transfer a file from your computer to your server
To transfer or upload a file from your computer to your server, you must click on the icon Upload (5) of the task bar.
A window opens, allowing you to select the file to transfer.
Once it is chosen, the operation starts automatically.
Set up a Proxy connection with Cyberduck
Note: The configuration of your proxy service is optional. It should only be done if you get the error message "Time Out" type.
- The use of proxy service with Cyberduck forced to use the proxy for all your Internet connections.
- First, an FTP connection need to has been set up
(To set up an FTP connection, refer to section 2.1 of this tutorial you)
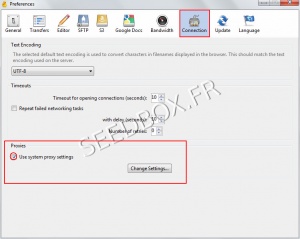
- Once configured it, click on "Edit" from Cyberduck taskbar, then "Preferences".
- A new window opens, click now on "Connection"
- Then, tick the box "Use system proxy settings" and finally "Change settings"
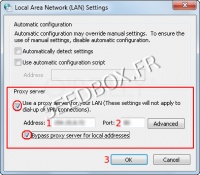
- Record in Box address, your server adress WITHOUT any HTTP or FTP before.
- Click OK to save your configuration .
- Your proxy is now configured and ready for use .
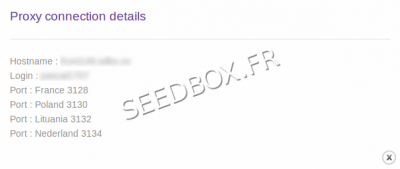
- You will need your login and password password to use it .
- These are available in your manager in the Additional Services.
You can use for your proxy several Ips.
You can check these in "Additionnal Services" then "Proxy service".
