Filezilla for Linux Ubuntu
De Documentation officielle Seedbox
Aller à la navigationAller à la rechercheSommaire
Download and install FileZilla
- Download the latest FileZilla version for Windows, Mac and Linux
http://filezilla-project.org/download.php?type=client
Installing FileZilla
- Follow the installation instructions and run the application.
Configuring FileZilla
- After installing the software, configure FileZilla to connect with your Server.
- You can configure FileZilla to manage multiple connections to several different servers.
Configuring the FTP connection
- Start FileZilla ...
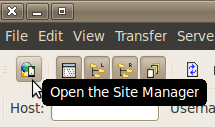
... and access the site manager
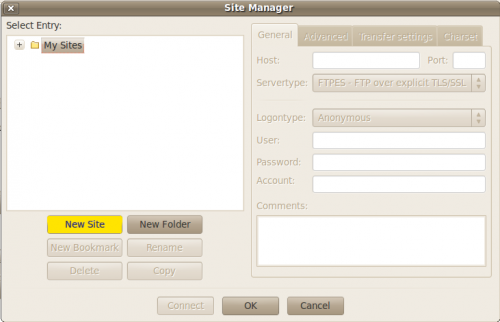
Site Manager
- Click on New Site
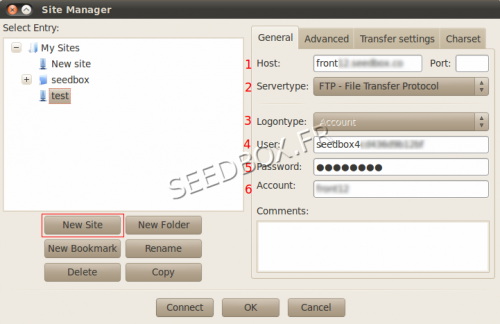
- Then fill out the required fields (yellow), taking care to respect the case sensitive password.
- The connection details are available in your Manager in Additional services.
- In host : Enter your servername WITHOUT any http or ftp.
- Server type MUST be FTP
- in Port : Let the box blank or enter port 21.
- Logon type MUST be account
- User is your LOGIN (The one chosen on your order form)
- Password is your password (The one chosen on your order form)
- Account, choose a name that suits for your connection
No other port other than 21 can be enter here
- Finally, click ok to save your account and then connect to your service .
Configure a proxy service with Filezilla
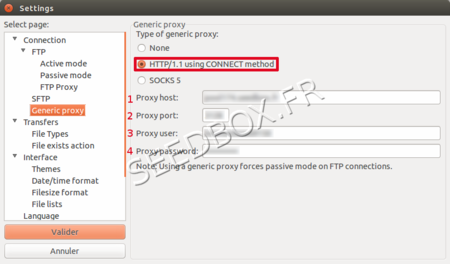
- To set up your proxy service with Filezilla, from software taskbar,
- Go to Edit,
- then Settings,
- click on Generic Proxy
- Choose HTTP/1.1 using CONNECT method
- Enter your servername without any http or ftp.
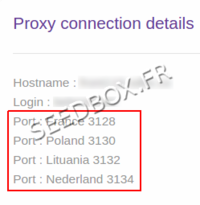
- Enter the proxy port choosen. (4 Ips are available)
- Enter your Login
- Enter your Password.
