How to use Webdav : Différence entre versions
De Documentation officielle Seedbox
Aller à la navigationAller à la recherche| Ligne 6 : | Ligne 6 : | ||
*First, you must configure a network drive, then edit the registry or use Windows patch | *First, you must configure a network drive, then edit the registry or use Windows patch | ||
| − | ==Configure the network drive== | + | ==Configure the network drive for Windows system== |
*To configure a network drive, first click on the icon "computer" from your desktop. | *To configure a network drive, first click on the icon "computer" from your desktop. | ||
Version du 26 juin 2019 à 10:50
Using Webdav
Configure Webdav
- Configuration takes place in two stages.
- First, you must configure a network drive, then edit the registry or use Windows patch
Configure the network drive for Windows system
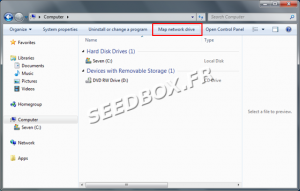
- To configure a network drive, first click on the icon "computer" from your desktop.
- Then click, "map a network drive"
- First, choose the letter you want to give to that network drive.
- Then, in folder, enter the address of the network drive.
You must enter the server address exactly as it is shown in ![]() thumbnail
thumbnail
- Credentials are available in your manager in "Advanced configuration" thumbnail, then "Webdav"
- Click on finish.
- It only remains to connect to your network drive.
- To do this, grab your login and password.
Note: Please remember that any action carried out through webdav affect data that are in your server. If you delete a file or folder through webdav, it is also deleted on your server.
