How to configure Remote GTK for Windows Seven
De Documentation officielle Seedbox
Aller à la navigationAller à la rechercheSommaire
Download the application
- To download the application, go to this address :
- Then click on the link to retrieve the application on your pc.
- A "Security Warning" window appears:
- Click on Save
- Your application is now ready to be configured.
Configure the application
BEFORE INSTALLING, YOU MUST RUN THE SOFTWARE COMPATIBLE WITH YOUR SYSTEM.
- For that, thank you for following the steps:
- 1 Go to the folder where transmission has been downloaded.
Select it and right click to access the file properties
- 2 Go to the Compatibility tab
- Then choose to make the program compatible with service pack 3 for Windows XP.
- Finally, click Apply.
- Your software is now ready to be installed.
Installing the software on your PC
- For all the steps that follow, we recommend not to change the default options.
- Once all these install steps are done, your software is ready for use.
Using the software
Before using remote transmission, you must allow remote acces.
- To do this, go to your manager, then allow it in Plugins & Modules, select, Authoriser, then Update.
Then,
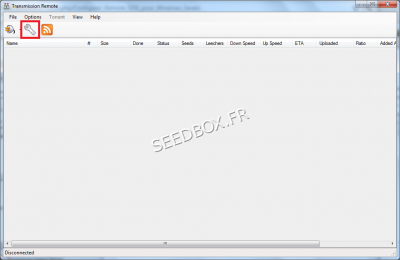
- From your software interface, click the wrench, then local seetings.
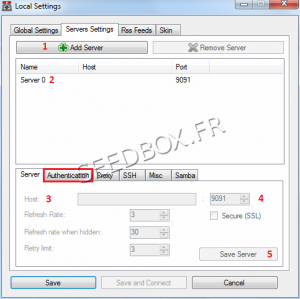
- Then go to the seetings servers tab,
- 1 Add your server.
Select it and then
- 2 Rename it,
- 3 In Host, enter your server address without ftp or http.
For example : front123.sdbx.co
- 4 Enter your HTTP server port.
- 5 Save your configuration.
then,
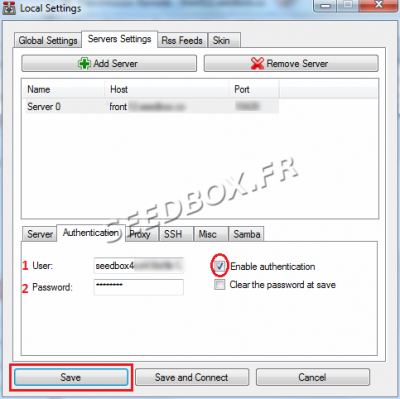
- Go to the Authentication tab.
- 1 Enter your user name.
- 2 Enter your password.
- tick "Enable authentication"
- All these informations are available in your manager in connection Details.
- Your software is now ready for use.


