Home : Différence entre versions
| Ligne 803 : | Ligne 803 : | ||
* [[How to renew my Service ?]] | * [[How to renew my Service ?]] | ||
* [[Subscribtion period|Subscribtion period]] | * [[Subscribtion period|Subscribtion period]] | ||
| + | * [[Paypal error 3005]] | ||
* [[Adds Fund|Adds Fund]] | * [[Adds Fund|Adds Fund]] | ||
Version du 27 novembre 2013 à 17:27
Welcome to Seedwiki, seedbox.fr wiki :)
Sommaire
- 1 Start with SeedWiki
- 2 Files Manager
- 2.1 Accessing your Files Manager home screen
- 2.2 The home screen of your manager
- 2.3 The language choice
- 2.4 icons in the task bar
- 2.5 Videos
- 2.6 Music
- 2.7 Images
- 2.8 Online image editing
- 2.9 Create your online image
- 2.10 Sharing your data with your Manager
- 2.11 Overview of shared items
- 2.12 Delete Content
- 2.13 Empty Trash
- 2.14 The bookmark manager
- 2.15 Create a .Zip archive
- 2.16 Retrieve data
- 3 Plugins and Software for Windows
- 4 Plugins & Software for MacoSX and Iphone
- 5 Plugins and Software for Linux and Android
- 6 Plugins for webbroswer
- 7 Web proxy for broswer
- 8 Empty your Webbroswer cache
- 9 Tips for all
- 10 Common Errors
- 11 compatibility
- 12 Support
- 13 Administrative, Subscription, Renew, Sponsorship
Start with SeedWiki
Order a service with Seedbox.fr
- It's quick and easy.
Seedbox Web Interface
Files Manager
- With Seedbox.fr, you can store, share or listen and watch all your files online.
Accessing your Files Manager home screen
- To acces to your files Manager, go to your Control Interface.
Then, click on Acces datas thunbails.
- A new window opens, asking for your login and your password.
- Once your credentials are entered, your interface manager opens.
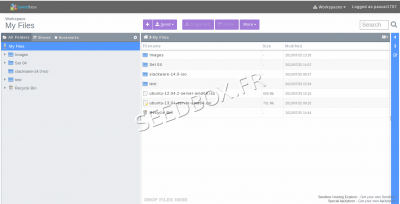
The home screen of your manager
- It contains all what you have downloaded online, or uploaded from your computer to your server.
The language choice
- The default language of your manager is French, to modify it, click login, a menu appears, click language,
- then choose one that suits you.
icons in the task bar
- When you click the +', you can create a new file or folder
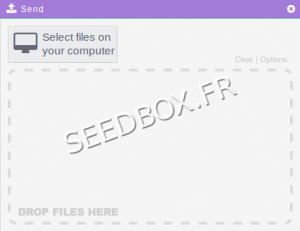
- you can send files from your computer to your file manager.
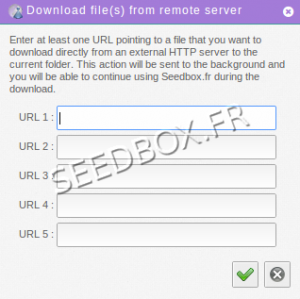
- Or from an url :
- Allows you to download a file from your manager to your computer.
- Allow you to view your images files, listen your music or watch a movie directly from your manager.
- It allow you to make actions on your files.
- You can make an .zip file
- You can tag your files
- You can put your files under supervision
- You can rename,
- you can remove
- you can delete
- you can copy
- You can download your file by chunk
- You can index content
- You can Bookmark your file.
Videos
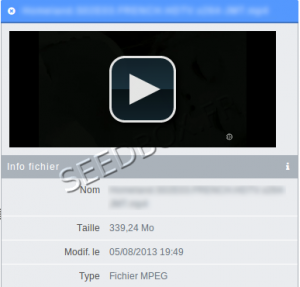
- You can, directly from your data manager, watch video.
- Just select the file you want to watch, then in the right panel it will displayed.
- It gives some informations, like the video name, when it has been uploaded and the type of the file.
- If the player is not display, click on the icon representing an arrow in the blue taskbar at the right of your manager.
- You can click the icon representing an arrow to open the embedded player
- By clicking on the eye icon, a player opens outside your manager.
- Tip : If you get some issu to play your video online, you can use VLC media player.
- Please have a look on this wiki . Chapiter 14
Music
Play your music online.
- From your manager, click the box,
- and choose your music folder by clicking it.
- On the right side of the manager, a window opens with your musical contents.
You can just click on the play button to play the song online.
- Toggle your file to a new panel
- Open your file in a new window.
- Give you informations about your file
- You can add tag.
If the player is not display, it means that the file format is not available.
Images
View and share photos with friends
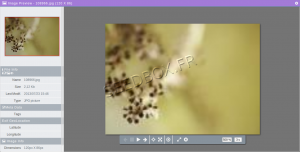
- You can view photos from your manager.
- To do this, click the box,
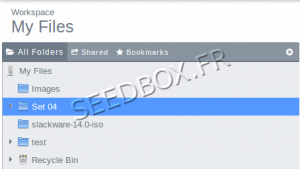
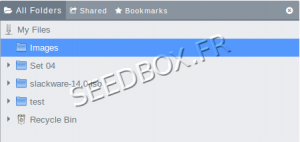
- and select your file by clicking on your picture folder, it will be highlighted
- 1- Toggle your file in a new pane
- 2- Open your file in a new windows
- 3- Give you informations about your files
- 4- You can tag your photo
- 5- What is the photo type.
- 6- You can use this fonction to share.
- You can also use the viewer. To do this double-click on the picture you want to watch, this one opens in a new window.
- Many choices are available through the task bar.
Online image editing
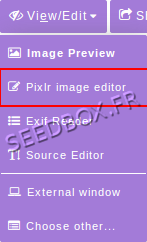
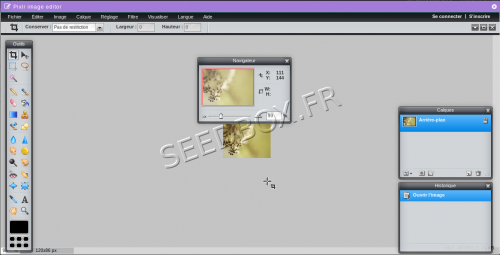
- Your manager has a specific tool for editing image online.
- To access it, click on Wiew/Edit, a menu opens, and choose Pixlr Image Editor.
- Your image opens in a new window, then you can make all the changes you want.
Create your online image
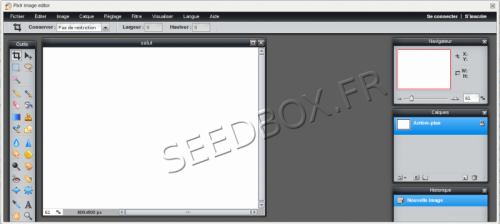
- To do this, access the menu,
- Click to create a new image,
- The image editor then appears.
- You can then create a new image.
Sharing your data with your Manager
- Your manager has a very simple function to share your datas with friends and family.
- Click on the file you want to share, this one will be highlighted
- Just click on this icon :
- A new windows opens.
- Define for how many time the link will be up.
- Define how many downloads can be made
- Define a password
- Then, clik on generate.
- A new window opens containing the link that you will send.
- To forward this link, click on (2)Invitations Thunbail
- You can easily stop sharing this link (1)
- Enter here, the email used to register
- Enter here, the people email adress with whom you want to share a file.
- To do this, you need to switch options in the dropdown menu. You must switch from "All folders" to "shared".
- Here are listed all the files that you shared with people.
Delete Content
- To remove data, you can,
- Use your FTP software, simply right-click on the folder or file you want to delete and select "Delete".
- This operation is not reversible and the files are permanently deleted.
Or,
You can use the explorer.
- Login to you explorer, then right-click on the file or folder to delete and select "Delete".
- Your files are now in the trash. At this point, you can restore them.
- Then, select your recycle bin
- Choose "More" from your taskbar, and then, choose "Empty Trash".
- This operation is not reversible, files and folders are permanently deleted.
Empty Trash
- Your manager get a "Recycle Bin".
- The content you delete will be sent to trash. This way you can at this time restore it again.
- To remove content, click on the icon or folder you want to delete, then it appears highlighted.
- By holding down the CTRL key, you can select multiple folders and files at once.
- After you had selected the files and folders you want to delete, dragging them to the trash .
- To delete them permanantly, you Must Empty Trash
The bookmark manager
- Your manager includes a bookmark manager.
- Very easy to use, select the file to be marked as favorite, then click on the icon represented by a yellow star.
- Your favorites files are gathered in the left side of your manager.
- To acces to it, click on bookmarks thunbail.
Create a .Zip archive
To create a zip archive, select the files you want to Zip.
- Then, click on "more" icon from your taskbar and select Compress.
- Now, choose a name for your archive, and compress will start.
More the files to compress are big, more it will take time.
Retrieve data
- To do this, select the data you want to recover on your hard drive.
- Selected files and folders appear highlighted
- You only have to click on Download icon located in the task bar.
- The download starts automatically.
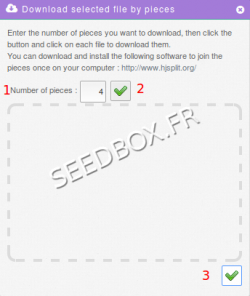
You can also download your archive by chunk, select more icon in taskbar, then Download chunked.
- 1 Choose in how many pieces your download will be done.
- 2 Validate it. ( The files part appears)
- 3 Validate your download.
- You can also use a FTP software that allow you to download folder.
- Please have a look here on our wiki, to find a ftp client for your operating system :
http://wiki.seedbox.fr/index.php/Home
Plugins and Software for Windows
Transmission-Remote
VPN services
To modify your IP address when you are on internet set up a VPN service has no use.
You should try instead to set up a web proxy
http://wiki.seedbox.fr/index.php/Home#Plugins_for_webbroswer
FTP Services
Tips
Plugins & Software for MacoSX and Iphone
Transmission-Remote
VPN Services
To modify your IP address when you are on internet set up a VPN service has no use.
You should try instead to set up a web proxy
http://wiki.seedbox.fr/index.php/Home#Plugins_for_webbroswer
FTP Service
Tips
Plugins and Software for Linux and Android
FTP Service
VPN Service
Tips
Plugins for webbroswer
Seedbox Extension for Firefox
- To download this application please follow this link:
https://addons.mozilla.org/fr/firefox/addon/seedbox-official/
Installing the extension
- To install the extension, first click on "Add to Firefox"
- A security window opens:
- You must click again on "Add to Firefox".
- After a quick download, your browser asks for confirmation:
Click Install now.
- Your application is now installed.
At this point you must restart your browser.
How to use your extension
- To retrieve a .torrent file and send it directly to your server,
- simply right click on the file (must be a file with .torrent extension), and choose Send To the Seedbox.
- Your file is immediatly available in your server.
- If, from the menu, the link "Send to Seedbox" is not proposed, that mean that the file can't be sent directly.
Note
- It may happen that after firefox update, this plugin could not work.
- Our technical team update this addons regulary.
- You can use instead our plugin for chrome.
http://wiki.seedbox.fr/index.php/Web_broswer_Plugin
Seedbox extension for Chrome
- To find this application go to :
https://chrome.google.com/webstore/detail/dlkebobkkpgcbkhfhiaejpkflhgpgkig
- To add it to your browser, simply click on add to Chrome:
- You can share it with your friends and familly by cliking on (2)
- Your browser will ask for confirmation:
- Click install.
- Your application is now installed.
- An icon is now on the right of your navigation bar:
Configure the extension
Note: Before using this plugin, you must allow remote control connection in Plugins & Modules from your manager.
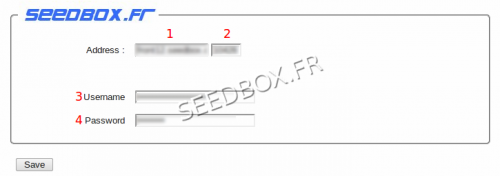
- To set your up your extension, you will need your servername, its port, and your username and password. (These can be found in your manager, or in your Welcome Email).
- Then, make a right-click on the transmission icon, click option.
- A new window will open:
Fill out the required fields. You Must enter exactly the informations as it is demand.
- 1 Your servername Ex : frontxxx.sdbx.co
- 2 Your HTTP server port
- 3 Your username
- 4 Your Password
- Click on save.
Setting up your extension is now complete.
It's ready for use.
Using the extension
- Left-click on the transmission icon
- The extension opens with a summary of your online server .
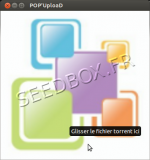
- To add torrent directly, click "Open/upload" in the window extension :
- Then, a new window will open:
- Just drag and drop your torrents directly after you get it, in that window for them to be launch.
- You can also choose "Sent to Seedbox" from contextual menu. This menu is shown by making a left click on the file to retrieve.
- Some files can't be retrieved with this addon. You may need to add it directly in your transfert interface or use transmission-remote.
Web proxy for broswer
Configure proxy with Internet Explorer.
- First, go to the Internet Explorer options :
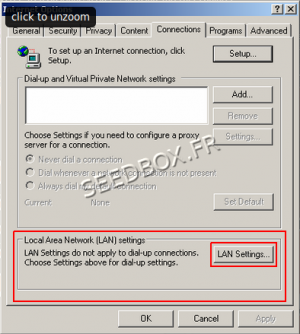
- A new window opens,
Click the Connections panel.
- And lan settings.
- We will now configure your proxy.
- Record in Box address, your server adress without any http or ftp.
Example : front123.sdbx.co
- We advise you to leave what has been checked by default.
- Click OK to save your configuration.
- Your proxy is now activated and its ready for use.
- Remember to have your login and password to use it.
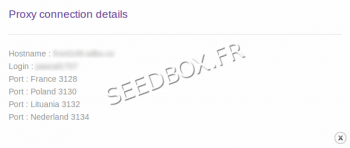
- These are available in your manager, in the section Additional services
Configure Proxy service for Chrome
- Go to the System Preferences tool and choose the Network icon
- Then choose what connection type you want to configure.
- Once your connection selected, click Advanced
- And select the Proxies tab
- Then select Web Proxy (HTTP) and fill the required fields
With :
- Your server name WITHOUT any http or ftp.
- The proxy port you want to use. Port of your proxy differs depending on the location chosen
- Your username
- Your Password
(All thes informations are available in your manager in Additional services)
- Remember to check the use mod Passive FTP (PASV)
- Then click OK and then Apply.
- All connections are now moving through your proxy.
- Safari will automatically use the system settings.
Configure the Proxy for Firefox
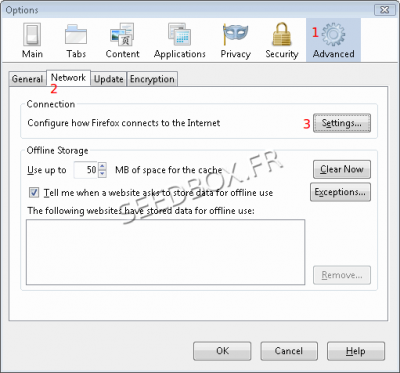
- To set up your proxy, go to Tools, then Options, then Advanced and finally Network
Then, in seetings,
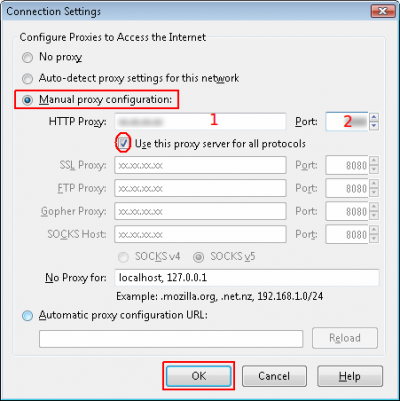
- Click Manual proxy configuration,
- 1- Enter your servername WITHOUT any http or ftp.
Example : front123.sdbx.co
- 2- Enter the proxy port you have chosen
Note : All these infos are available in your manager in Additional service
- Finally, click on OK
Configure the proxy for Safari
- Go to System Preferences tool and choose Network icon.
- Then choose what connection type you want to configure.
(Here we configure an Ethernet connection, but the principle is the same for a wifi connection).
Once your connection selected, click Advanced,
- Select Proxies tab.
Then, select Web Proxy (HTTP) and fill the required fields.
- Your servername without any ftp or http,
- The proxy port you want to use. Proxy port differs depending on the location chosen,
- Your username,
- Your password.
(All these informations are available in your manager in Additional Service).
- Remember to check use mod Passive FTP (PASV).
Then click OK and then Apply.
All connections are now moving through your proxy.
Safari will automatically use the system settings.
Empty your Webbroswer cache
Chrome
- Open the settings on Chrome.
- Click the menu icon in the upper right corner of the browser to the right.
- Click settings on the bottom of the menu.
- A faster way to get there is to press Control+Shift+Delete on a PC, or Shift+Command+Delete on a Mac.
- From settings, click "Show advanced settings...".
- It's located at the very bottom of the settings section.
- Scroll to the privacy section and click "Clear browsing data".
- Select "Empty the cache".
- Uncheck all other options to avoid deleting browser history, cookies and other things you may wish to retain.
- Change "Obliterate the following items from" to "the beginning of time".
- Press "Clear browsing data".
Internet Explorer
- Once your browser is open, click the gear icon at the top right to open the "Settings" menu.
- Then, select "Safety" and "Delete Browsing History"
- Or, alternately, you may simply press Ctrl+Shift+Delete to open the Delete Browsing History window.
- Select "Temporary Internet Files".
- You will also need to "uncheck" all of the other boxes, especially "Preserve Favorites website data"
- This option makes the window also delete objects from websites in your Favorites folder, taht is necessary to completely clear your cache.
- Click the "Delete" button near the bottom of the window to perform the operations (i.e. clear your cache by deleting temporary files).
- Your computer will work for a moment, and then the process will be complete.
Safari
- Open Safari,
- Then choose Safari.
- Click Reset Safari
- In the reset window that opens you:
- Check the box Empty the cache (Empty the cache).
- Check the box Delete Cookies (Remove all cookies).
- Click the Reset button (Reset), bottom right.
- Restart the browser.
Note: In newer versions of Safari (V5.1.x), these two options have been replaced by a single box.
- By checking this box it erases both the cache and cookies.
Android
- Open the browser.
- Hit the Menu Key.
- Click on the "More Options" button.
- Click on "Settings"
- Hit "Clear Cache." You'll then be presented with a verification menu.
- Hit "Okay" or "Clear Cache" again (depending on the version of your phone) to complete the process.
Konqueror
- Once your browser is open, click the menu "Parameters" and select "Configure Konqueror "
- Scroll through the list of images and select "cache"
- Then click on "Clear cache"
Tips for all
- How to change your server ip
- Torrent auto pause
- "Queued for download" message
- Change your client version
- How to know how much data are stored
- Create a direct link from a tracker to your server
- I ve lost my Password for plugins. What can i do ?
- How to use Webdav
- Clear your Web broswer cache
- Stream your files with VLC
- How play video from manager
- How to play music from manager
- How to set up XBMC with your Seedbox
- Public tracker
- Messages that can be display on your torrent files
- Transfert interface display "Connection Failed" message
- Transfert interface display "unreachable" message
- File Upload
- My FTp speed seems slow
- Upgrade my service
- How to transfert data between two Seedbox
Common Errors
compatibility
Support
- Support by email/ticket
- phone support
- How to write a message for support ?
- How do I add an attachment in a message towards the support?
